
Memory Module Install for Porsche Cayenne 958
Read full instructions and watch videos before start, so you are familiar with the process. It's pretty straightforward and shouldn't take more than 10-20 minutes. Don't hesitate to contact T-Design if have any questions!
Tools needed:
- T20 bit
- plastic trim removal tool(freight harbor, amazon)
- flat screw driver
- long nose pliers
0. Remove the key from the ignition. Make sure ignition is off in case of remote key
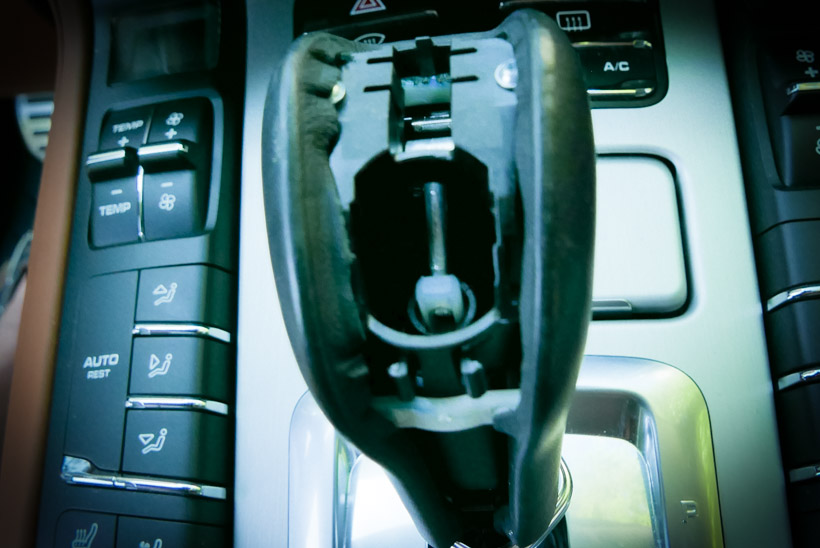
1. Using trim removal tool, pry the insert from the gearshift knob
2. Push down the steel pin, until it locks in down position. First push down until it stops, then push down just a little further, it'll lock in down position
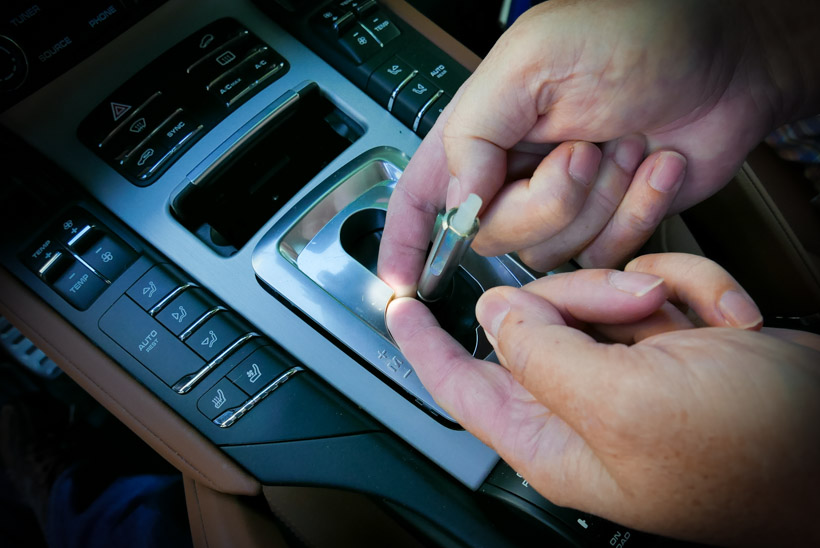
3. Rotate the metal base of the gearshift knob counterclock wise 90 degrees
4. Slide the gearshift knob up and out
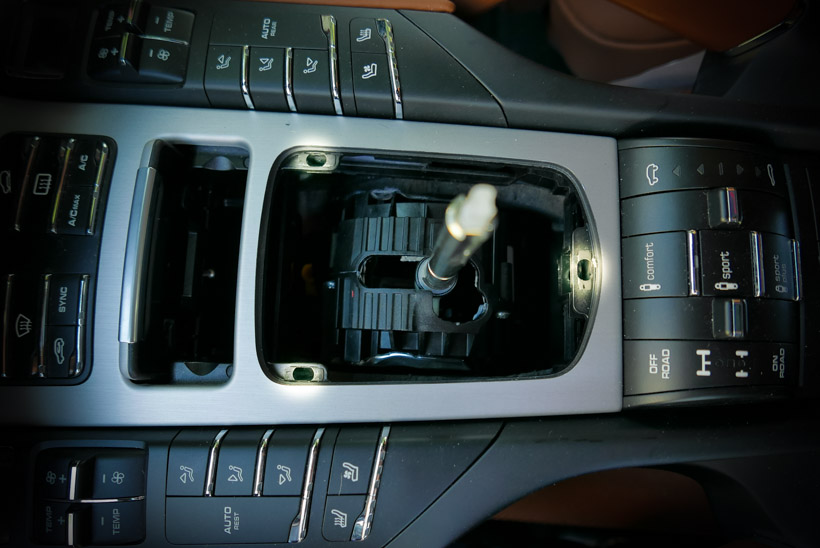
5. Pull the gear selector trim up as shown
It is held by 3 clips
6. Unscrew 2 T20 bolts in the ashtray area
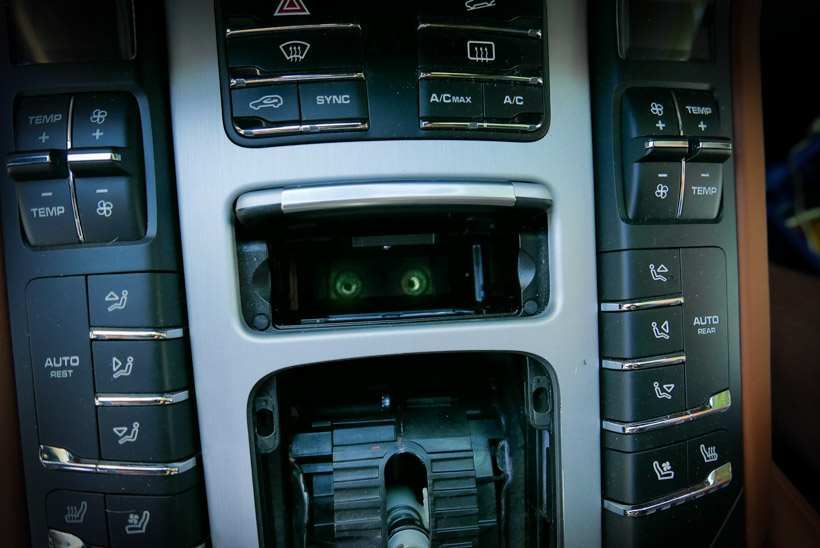
7. Pull the silver trim up about 20 degrees. You don't need to remove it
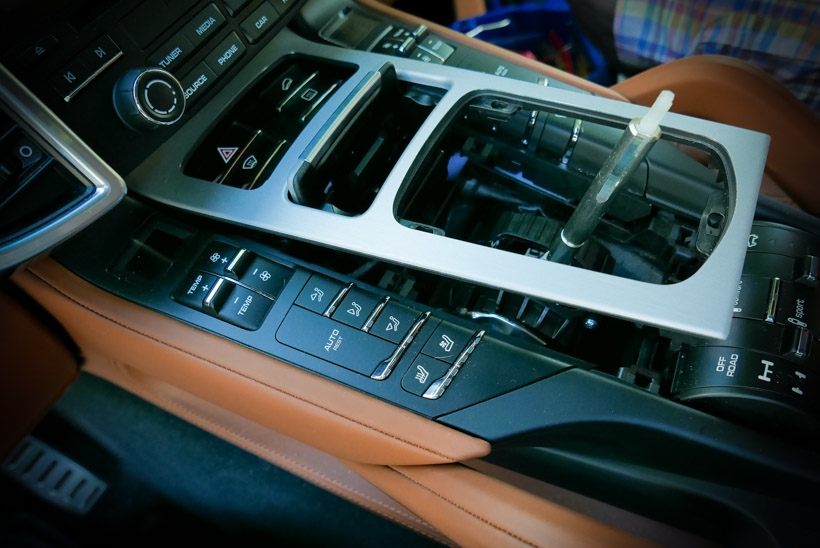
It is held by 4 clips at the corners of gearshift opening
8. Using trim removal tool Work the button module up and disconnect it
9. Pull the whole console top up about 30 degrees. You don't need to remove it. It is held by 2 clips in the back
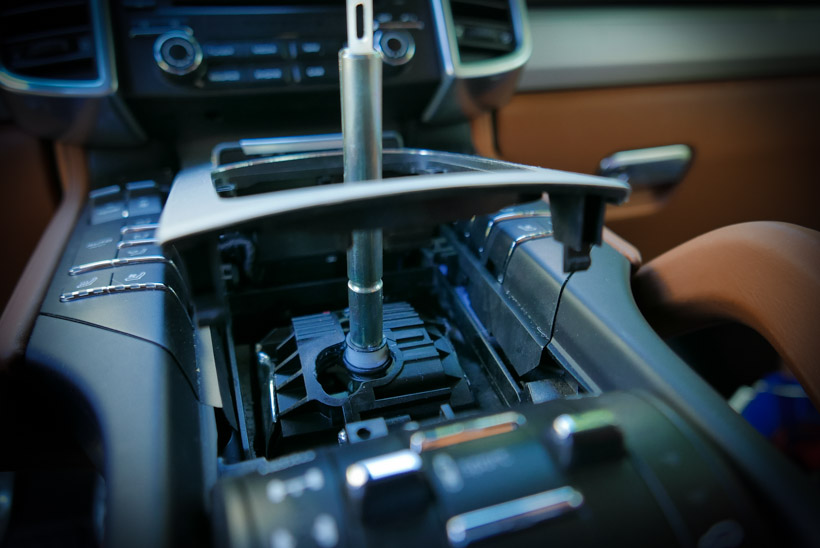
10. Place the memory module [MM] near the gearshift base. Do not attach it yet
11. Fish the [MM] wires through the opening to where the buttons box sits
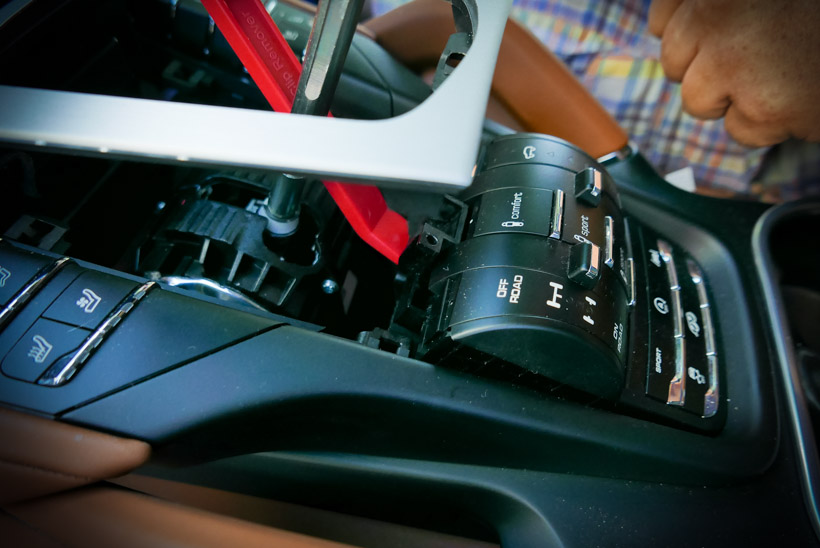
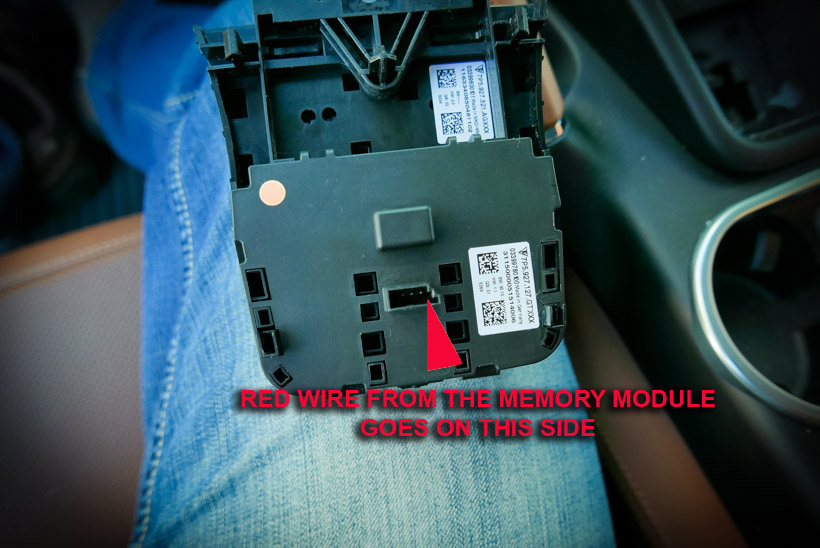
12. Connect female connector from the [MM] to the male/pins on the buttons box.
Important!: red wire goes on the keyed side
Important!: make sure all 3 wires connect
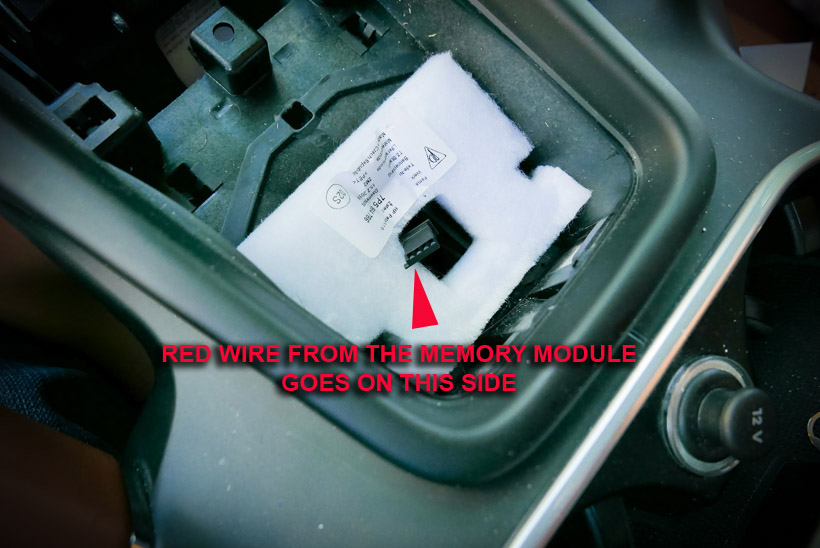
13. Connect the male connector from the [MM] to the harness from the car
Important!: red wire goes on the keyed side
Important!: make sure all 3 wires connect
14. Start the car and make sure [MM] works as intended
15. Pill the cover from the tape on [MM] and stick it to the right side of gearshift base
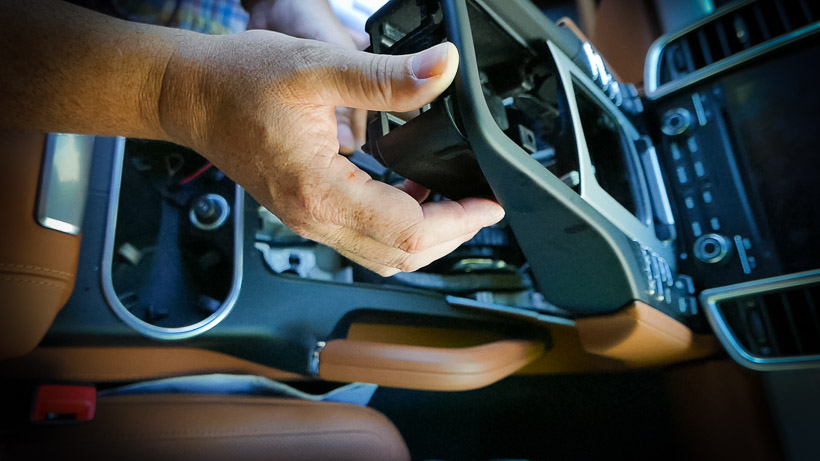
16. Carefully install the buttons box back and push the console top down while gently pulling wires from / toward gearshift base
17. Neatly coil and tuck extra wires near the gearshift base
NN. Put everything else back as it were
Installation video part 1
Installation video part 2
contact us: info@T-Design9.com